This article mainly introduces how to disassemble the Cummins M11 series engine fuel system and ECM cooling plate
(1) Install the engine on the bench
①Use the engine overhaul bench (Part No. 3375194) and the connecting plate (Part No. 3376432), and install the connecting disk to the overhaul bench with 5 bolts with a part number of 5/8-11 ?in. The tightening torque is 180N. , see Figure 2-43.
② Install two guide pins (part number 3376488) at the screw holes 1 and 2 of the water channel cover, and use a lifting device to install the engine on the connecting plate of the bench, see Figure 2-44.


① Remove the fuel supply hose and fuel filter seat, see Figure 2-48.

② Remove the fuel supply pipe and return pipe from the cylinder head, and remove the fuel gear pump cooling pipe, see Figure 2-49.
③ Remove the actuator wiring harness from the fuel pump fuel cut-off valve and label the wires for easy identification, see Figure 2-50.

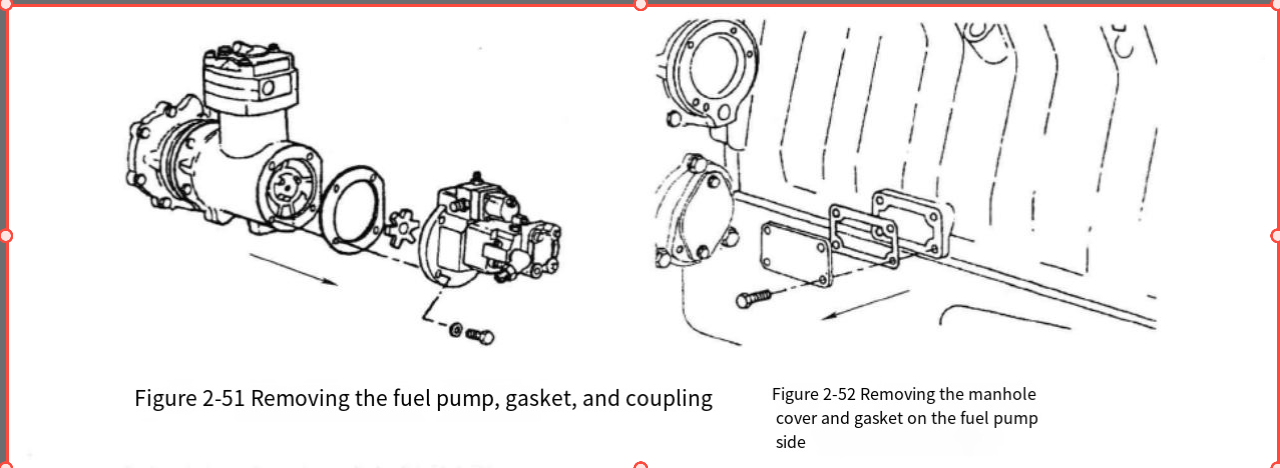
④ Remove the 4 mounting bolts, fuel pump, sealing gasket and star coupling connected to the fuel pump, see Figure 2-51.
⑤ Remove the inspection hole cover and sealing gasket on the fuel pump side, see Figure 2-52.
CUMMINGS INPOWER PRO 14.5 Diagnostic Software with 2023.6 PGA by remote installation
(3) Removal of ECM and ECM cooling plate
① If an atmospheric pressure sensor is installed on the engine, remove the atmospheric pressure sensor and connecting wires from the front bracket of the ECM, see Figure 2-53.
② Remove the wire harness clamps from positions 1 and 2 on the ECM bracket, loosen the AMP connector mounting bolts on the sensor wire harness, and remove the actuator wire harness and sensor wire harness from the ECM, see Figure 2-54.
③ Remove the ECM mounting bolts, star washer and ECM, see Figure 2-55.
④ Remove the 4 fixing bolts, ECM cooling plate and mounting bracket, see Figure 2-56.


没有评论:
发表评论