For Yanmar Diesel Engine Agriculture Excavator Tractor Marine Generator Diagnostic tool
(3)Mount the fuel injection pump on the pump tester plat-


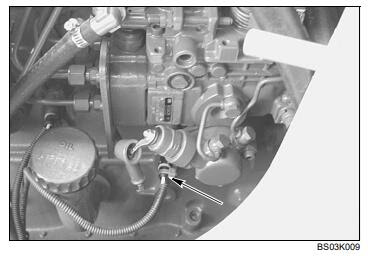
(4) Remove the control rack blind cover and fit the rack indicator.
Next, turn the pinion from the side of the pump until the control rack is at the maximurm drive side position, and set it to the rack indicator scale standard position.
Then make sure that the control rack and rack indicator slide smoothly.
(5) Check control rack stroke Make sure the rack position is at 11.5~ 12.5mm (0.4527
~ 0.4921in.) on the indicator scale when the governor control lever is set at the maximum operating position.
If it is not at this value, change the link connecting the govemor and control rack to adjust it.
NOTE: Links are availabe in 1mm (0.0394in. Jincrements.
(6) Remove the plug in the oil fill hole on the top of the governor case, and fill the pump with about 200cc of pump oil or engine oil.
(7) Complete fuel oil piping and operate the pump tester to purge the line of air.
(8) Set the pressure of oil fed from the pump tester to the injection pump at 0.2~0.3kg/cm2(2.84~4.26 In/in.2).
4-2 Adjustment of top clearance Adjust the top clearance(the clearance between the top of plunger and the top of barrel with the cam at top dead center) of each cylinder plunger to bring it to the specified value by changing the thickness of the shims.
(1) Place the top clearance gauge on a level surface and set the gauge to zero.
(2) Remove the injection pump delivery retainer, take out the delivery valve assembly, insert the top clearance gauge and tighten by hand.
Yanmar Engine Diagnostic Service Tool Software(3) Turn the camshatt, and bring the cam to the top dead center while watching the gauge needle.
(4) Read the gauge at this position, and adjust until the clearance is at the specified value by changing ad.
Justing shims.
Tighten the adjusting screw after completing adjust.
ment.
(Greater shim thickness decreases top clearance and smaller shim thickness increases top clearance).

NOTE: Adjust while watching gauge, and then tighten.
(5) After adjustment is completed, insert the delivery valve assembly and tighten the delivery retainer. kom(h-.b)
3.5~4.0
Deivery retainer tightening torque |(2531~2893)
Repeat the above procedure to adjust the top clearance of each cylinder.
4-3Adjusting of injection timing After adjusting the top clearance for all cylinders, check/adjust the injection timing.

Yanmar Heavy Equipment EPC 11.2009
(1) Set the governor control lever to the operating position and fix(bring plunger to the effective injection range), turn the camshaft clockwise, and check the injection starting time (FID) of cylinder No.1(start of discharge of fuel from the delivery retainer).
Cylinder no.| Count from the drive side Direction of rotation | Right looking from drive side
(2) In the above state, set the tester needle to a position easy to read on the flywheel scale, and check the injec.
tion timing several tirmes by reading the flywheel scale, according to the injection order.

(3) Readjust the top clearance of cylinders that are not within the allowable deviation(increasing adjusting shim thickness makes injection timing faster, and decreasing makes it slower).
The change in injection timing effected by adjusting shims is as follows:

(4) When you have readjusted top clearance, make sure it is within allowable values after completing adjustment.
mm(in.) Allowable top clearance0.3(0.0118)
NOTE:1. All cylinders must be readjiusted it any one shows less than the allowable value.
2. If the top clearance is less than the allowable value, the plunger will hit the delivery valve or the plunger flange will hit the plunger barrel.
(1) Mount the pressure gauge to the delivery retainer of the cylinder to be tested.
(2) Set the governor control lever to the stop position, operate the injection pump at about 200 rpm, and make sure that the pressure gauge reading is 500 kg/cm?
(7110 lb/in.7) or more while lightly moving the control pinion gear towards full throttle(drive side) from the pump.
Replace the plunger if the pressure does not reach this value.
(3) Immediately release the gear after the pressure rises to stop injection.
At the same time, check to see that oil is not leaking from the delivery retainer or fuel injection piping, and that there is no extreme drop in pressure.
4-5Dellvery valve pressure test
(1) Perform the plunger pressure test in the same way, bringing the pressure to about 120 kgl/cm2(1706 tb/in.2), and then stopping injection.

(2) After pressure rises to the above value, measure the time it takes to drop from 100~ 90 kg/cm2(1422 ~2702
Ib/in.).
100→90kg/cm25 seconds
(1422~1280 ib/in.2)(to drop 10 kg/cm"(142 lb/in.)
If the pressure drops faster than this, wasli the delivery valve, and retest. Replace the delivery valve if the pressure continues to drop rapidly.
4-6Adjusting Injection volume(uniformity of each cylinder)
The injection volume is determined by the fuel injection pump rpm and rack position. Check and adjust to bring to specified value.
4-6.1 Measuring injection volume
(1) Preparation Set the pump rpm, rack position and measuring stroke to the specified value and measure: Pump RPM1800pm Pump rotating direction Right looking from drive side Fass ingicator scale 7mm (o.2756 i)
reading Remove the rack stop bolt behind the pump and screw in the rack fixing bolt to fix the rack.

(2) Measuring injection volume Measure the Injection volume at the standard stroke, and adjust as follows if it is not within the specified value.
Measuring stroke 1.000t Specified injection volume |See injection pump at standard rack position |service data Nonuniformity of cylinders 3%
4-6.2 Adjustment of injection volume Measure the injection volume in measuring cylinders for each cylinder, and adjust if necessary to obtain the specified values.
(1) Push the control rack all the way to the drive side, stop with the rack fixing bolt, and loosen the pinion/sleeve fixing bolt 1/3 of a revolution.
(2) When the control sleeve is turned to the right or left, the plunger is turned through the same angle to in-
crease or decrease injection volume.
The injection volume is increased when the control sleeve is turned in the-direction and decreased when turned in the-direction in the following figure.
(3) Measure the injection volume of each cylinder again.
Repeat this process until the injection volume for every cylinder is the same(within the specified limit).
(4) Next, measure the injection volumes under different conditions, and make sure the injection volume for every cylinder is within the specifications.
Replace the plunger if the injection volume is not within specifications.
NOTE: See adjustment data for the speciied injection volume value at other measuring points.
(5) After completing measurement, firmly tighten the piston/sleeve fixing screw.
(6) If not aligned with the match mark, make a new match mark.
4-7Adjustment of governor
4-7.1Adjusting fuel limit bolt
(1) Adjust the tightness of the fuel limit bolt to bring the rack position to the specified value (R) with the governor control lever all the way down towards the fuel increase position, while keeping the pump at rated rpm N.

(2) Measure fuei injection volume at rack position (Ri).
Tightening of fuel limit bolt.
(3) If the injection volume is at the specified value, tighten the fuel limit bolt lock nut at that position.
4-7.2 Adjusting RPM limit bolt
(1) Gradualy loosen the governor control lever while keep ing the pump drive condition in the same condition as when the fuel limit bolt was adjusted, and adjust the tightness of the RPM limit bolt to the point where the rack position just exceeds the specified value(Ri).
(2) Check maximum RPM at no load Further increase rpm, and make sure that rack position
(R2=R1-L) corresponding to maximum rpm at no load is within specified value(Nz).
N9.0ad B&; RPM 1950rom YPUmD RPi
4-7.3Adjusting idling
(1) Maintain the pump rpm at specified rpm (N).
Yanmar Engine Diagnostic Service Tool Software

(2) Measure the injection volume while lowering the governor control lever to the Idling position, and adjust the position of the control lever with the idting adjust-
ment bolt to bring it to the specified value.
Measuing 5trgke|1000 st Idling injection volumeSee irjection purmp survice dra
4-7.4 Check injection volume when starting
(1) Make sure the control rack moves smoothly while gradually reducing idling rpm.
(2) Next, fix the governor control lever at the full load position with the pump at the specified rpm(Na). Make sure that control rack is at the maximum rack position
(11.05~12.05).
Measure the injection volume and check to make sure it is within the specified value.
Pump pm (N)200rpm Rack indicator scale |11.5~12.5mm(0.4527~0.4921 in.)
Measuring stroke|1000st Injection volurme|See injection pumo swrvice data Checking injection stop Drive the pump at rated rpm(N1) and standard rack position(R1) with the governor control lever at the fullload position, operate the stop lever on the back of the governor case, and make sure that injection to all cylinders is stopped.
NOTE: Be sure to remove the rack fixing bolt when doing this.